

In the vibrant world of DIY projects, creating your own snack standing pouches is a rewarding endeavor that combines creativity with practicality. As a supplier deeply entrenched in the snack standing pouch industry, I've witnessed firsthand the growing interest in DIY solutions. Not only does it offer a personalized touch to your snacks, but it also allows for cost - effective packaging. In this blog, I'll delve into the essential tools required to make a DIY snack standing pouch, ensuring that you're well - equipped to embark on this exciting journey.
Cutting Tools
The foundation of any DIY project lies in precise cutting. When it comes to snack standing pouches, a sharp pair of scissors is a must - have. Look for scissors with a fine tip that can cut through various materials, such as plastic films, laminated papers, and Kraft papers. A good pair of scissors should be comfortable to hold and able to make clean, straight cuts. For more complex shapes and larger volumes, a utility knife can be a great addition. It provides more control and can handle thicker materials. Make sure to use a cutting mat underneath to protect your work surface and ensure accurate cuts.
Sealing Tools
Once you've cut the materials to the desired shape, the next step is to seal the edges to create a pouch. There are several sealing tools available, each with its own advantages.
Heat Sealer
A heat sealer is one of the most popular tools for sealing snack standing pouches. It works by applying heat to the edges of the material, melting them together to form a strong seal. There are different types of heat sealers, ranging from handheld models for small - scale projects to industrial - grade machines for larger productions. Handheld heat sealers are affordable, easy to use, and perfect for DIY enthusiasts. They are suitable for sealing plastic films, which are commonly used in snack packaging.
Impulse Sealer
An impulse sealer is another option that offers quick and efficient sealing. It uses an electrical impulse to generate heat, which is then applied to the material for a short period. This type of sealer is ideal for sealing thicker materials, such as laminated films. It can create a hermetic seal, which helps to keep the snacks fresh for a longer time.
Adhesive Tape
For a more basic and temporary sealing solution, adhesive tape can be used. There are various types of tapes available, such as clear packing tape and double - sided tape. While not as durable as heat - sealed joints, tape can be a convenient option for quick prototypes or when you don't have access to a heat sealer.
Measuring Tools
Accuracy is key when making snack standing pouches. Measuring tools help you ensure that the pouches are of the right size and shape.
Ruler
A ruler is a fundamental measuring tool. It can be used to measure the length, width, and height of the pouch. A metal or plastic ruler with clear markings is recommended for precise measurements. You can use it to mark the cutting lines on the material before cutting.
Calipers
Calipers are more precise measuring tools that can measure the thickness of the materials. This is important, especially when working with different types of films or papers. Knowing the thickness can help you choose the appropriate sealing method and settings.
Printing Tools (Optional)
If you want to add a personalized touch to your snack standing pouches, printing tools can be used.
Inkjet Printer
An inkjet printer can be used to print designs, labels, or information directly onto the material. You can create your own designs using graphic design software and then print them on special printable films or papers. This allows you to customize the appearance of your pouches according to your brand or personal preference.
Stamp and Ink
For a more traditional and artistic approach, stamps and ink can be used. You can create or purchase stamps with different designs and use them to add patterns or logos to the pouches. This method is relatively inexpensive and can add a unique, handmade look to your packaging.
Other Tools
In addition to the above - mentioned tools, there are some other tools that can make the DIY process easier.
Hole Puncher
A hole puncher can be used to create holes for hanging the pouches on shelves or for attaching tags. It is a simple yet useful tool that can add functionality to your snack standing pouches.
Pouch Cutter
A pouch cutter is a specialized tool designed to cut the edges of the pouches neatly. It can create a smooth and professional - looking finish, which is especially important for the final appearance of the product.
Materials for DIY Snack Standing Pouches
When making DIY snack standing pouches, choosing the right materials is as important as having the right tools. Here are some common materials used:

Plastic Films
Plastic films are widely used in snack packaging due to their durability, flexibility, and transparency. They can provide a good barrier against moisture, oxygen, and light, which helps to keep the snacks fresh. There are different types of plastic films, such as polyethylene (PE), polypropylene (PP), and polyester (PET). You can find these films in various thicknesses and finishes, depending on your specific needs.
Laminated Films
Laminated films are made by combining two or more layers of different materials. They offer enhanced protection and functionality compared to single - layer plastic films. For example, a laminated film may consist of a layer of plastic for moisture resistance and a layer of aluminum foil for oxygen and light barrier. These films are commonly used for packaging snacks that require a longer shelf - life.
Kraft Paper
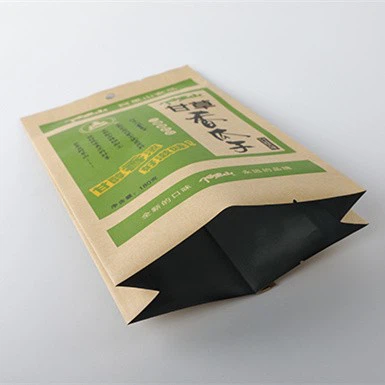
Kraft paper is a popular choice for eco - friendly snack packaging. It is made from wood pulp and is biodegradable and recyclable. Kraft paper has a natural, rustic look that can add a touch of authenticity to your snacks. You can find different grades of Kraft paper, ranging from thin and lightweight to thick and sturdy. For more information on snack Kraft paper bags, you can visit Snack Kraft Paper Bag.
Retort Bags
Retort bags are designed to withstand high - temperature processing, such as retort cooking. They are commonly used for packaging ready - to - eat snacks and meals. These bags are made from a combination of materials, including plastic and aluminum foil, which can provide excellent barrier properties. If you're interested in retort bags, you can check out Retort Bag.
Food Laser Bags
Food laser bags are a type of innovative packaging that uses laser - perforated technology to create a controlled atmosphere inside the pouch. This helps to extend the shelf - life of the snacks by regulating the exchange of gases. For more details on food laser bags, visit Food Laser Bag.
Conclusion
Making your own snack standing pouches can be a fun and fulfilling DIY project. By having the right tools and choosing the appropriate materials, you can create high - quality pouches that meet your specific needs. Whether you're a small - business owner looking to package your snacks or an individual who wants to add a personal touch to your homemade treats, these tools and materials will help you achieve your goals.
If you're interested in purchasing high - quality materials for your DIY snack standing pouch projects or have any questions about our products, feel free to reach out. We're here to assist you with all your packaging needs and look forward to the opportunity to discuss your requirements and find the best solutions for you.
References
- Packaging World. (2023). Guide to Snack Packaging Materials.
- Smith, J. (2022). DIY Packaging: A Practical Approach.
- Food Packaging Magazine. (2023). The Latest Trends in Snack Packaging.